script
這是總結,可以一次執行:
可用以下指令安裝:1
curl https://gist.githubusercontent.com/nobodyzxc/5e9bb4d6134dfa5e9a98709ae9b945b3/raw | bash
安裝前準備
USB flash installation media
首先我們要準備一支 live USB。
下載好 Arch Linux ISO 檔
先用 lsblk 看要安裝的 USB。1
2
3
4
5
6
7NAME MAJ:MIN RM SIZE RO TYPE MOUNTPOINT
sda 8:0 0 465.8G 0 disk
├─sda1 8:1 0 256M 0 part /efi
├─sda2 8:2 0 449.5G 0 part /
└─sda3 8:3 0 16G 0 part [SWAP]
sdb 8:16 1 15G 0 disk
└─sdb1 8:17 1 15G 0 part
wiki:1
dd bs=4M if=path/to/archlinux.iso of=/dev/sdx status=progress oflag=sync
要把 sdx 換成 sdb 那我們下載的 iso 位置為 /home/zxc/Downloads/archlinux-2019.02.01-x86_64.iso
所以我們的指令為:
1 | sudo dd bs=4M if=/home/zxc/Downloads/archlinux-2019.02.01-x86_64.iso of=/dev/sdb && sync |
開機
接著我們將 USB 裝上欲安裝的主機,然後
- 開啟電源後按 F12 (我的桌機)
- ESC + 電源鍵(我的筆電)選擇開機硬體。
因為我們要用 GRUB 引導程序(可以選擇要開機的硬碟,雙系統可以用)
所以選擇 USB 有 UEFI 的選項。
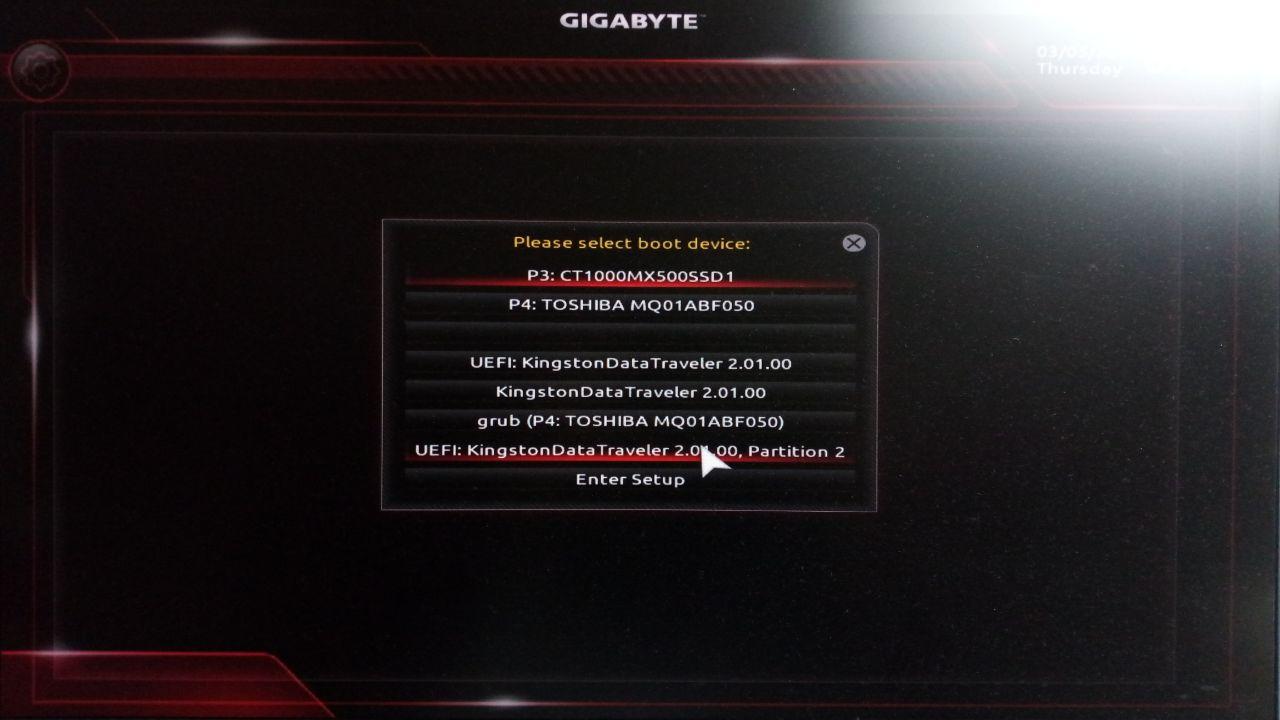
選擇後應該會長這樣: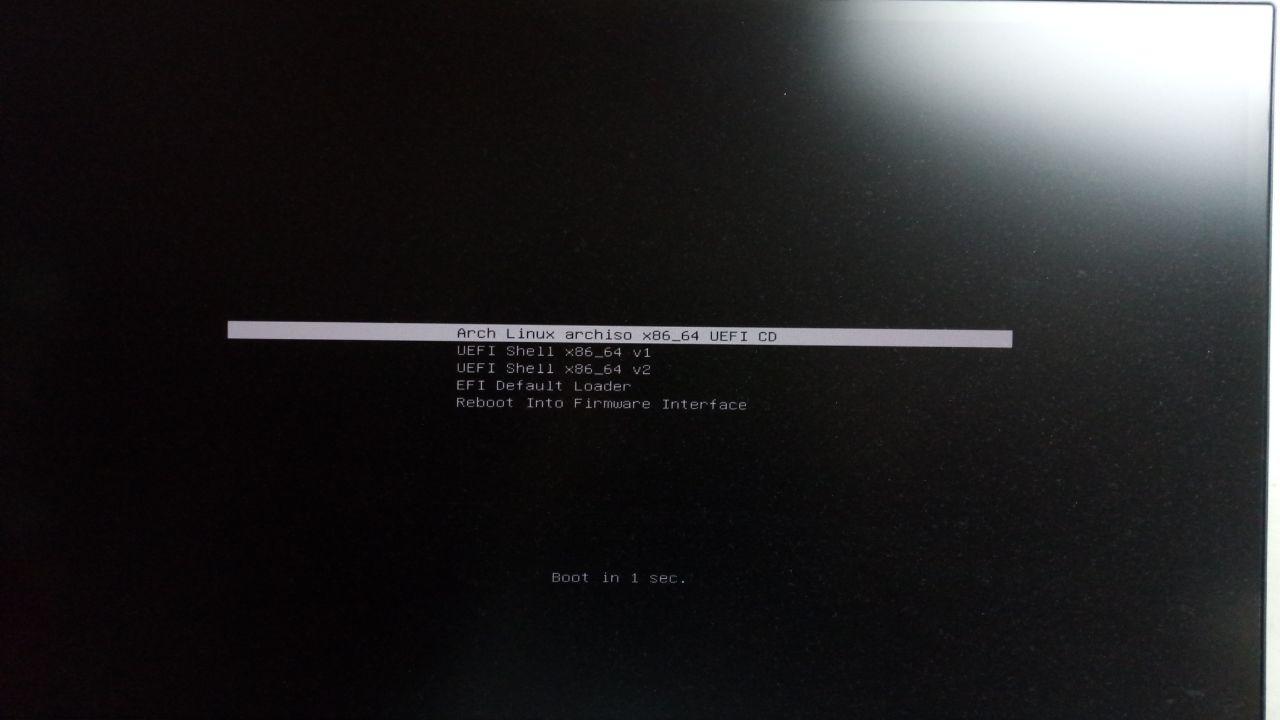
選錯了會長這樣: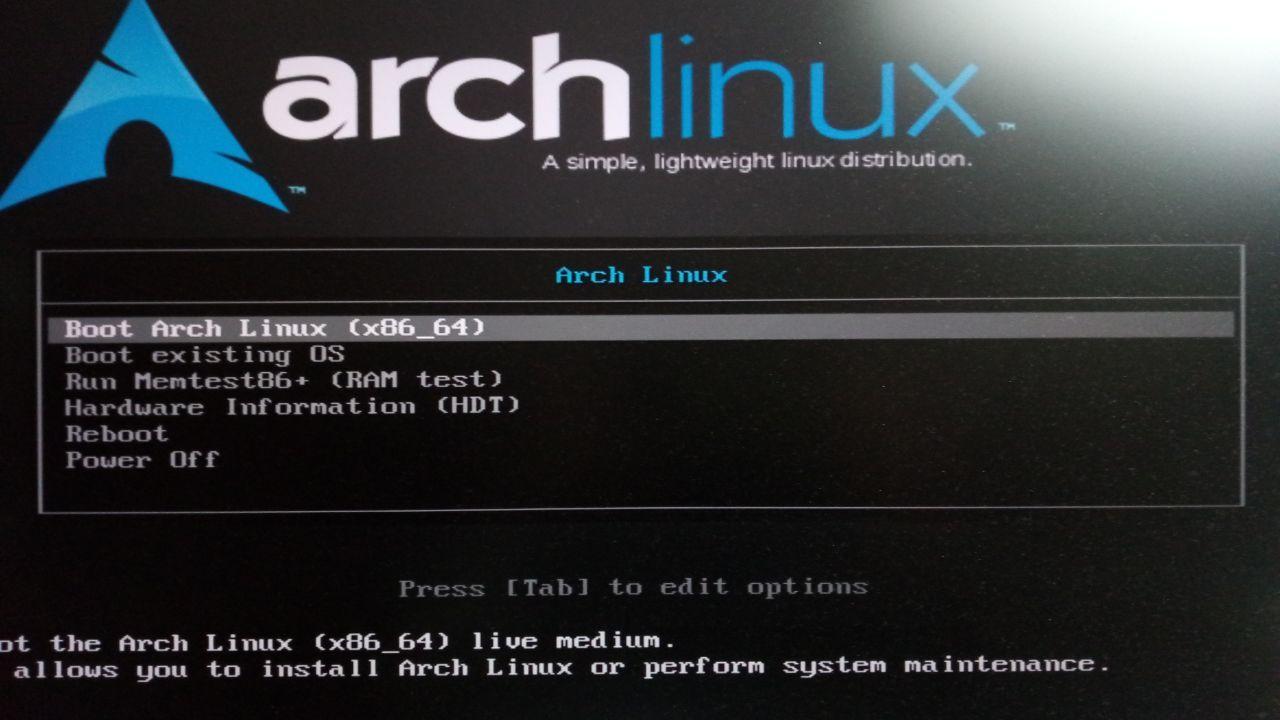
以 root 進入 zsh。
zsh 設定
鍵盤 default US 有需要再參考 wiki。
啟動模式 同上。
接上有線網路,然後 dhcpcd,ping archlinux.org 查看狀態是否成功。
更新時間 timedatectl set-ntp true,timedatectl status 查看是否成功。
硬碟切割
看你要把 archlinux 裝在哪顆硬碟上,此次為 /dev/sda。
fdisk /dev/sda
進入 fdisk prompt。
先創造 GPT table。1
command: g
切 /efi1
2
3
4command: n
partition number: (default=1)
first sector: (default=2048)
last sector: +260M
切 / (後來我因為裝 cuda, 會佔用 /usr 空間,所以提升至 64G)1
2
3
4command: n
partition number: (default=2)
first sector: (default)
last sector: +32G
切 swap,我有 16G RAM,切 16G swap (多切一點ww)。1
2
3
4command: n
partition number: (default=3)
first sector: (default)
last sector: +16G
切 /home,切完。1
2
3
4command: n
partition number: (default=4)
first sector: (default)
last sector: (default)
更換磁區類型,可以用在鍵入 t 後用 L 查看所有類型。
/efi => EFI System(type 1)/ => Linux filesystem(type 20)swap => Linux swap(type 19)/home => Linux filesystem(type 20)
1 | command: t |
1 | command: t |
1 | command: t |
1 | command: t |
以設定進行切割並離開。1
command: w
格式化硬碟
vfat 格式化 /efi 分區。1
mkfs.vfat /dev/sda1
ext4 格式化 / 及 /home 分區。1
2mkfs.ext4 /dev/sda2
mkfs.ext4 /dev/sda4
格式化 swap 分區。1
2mkswap /dev/sda3
swapon /dev/sda3
掛載切好的磁區
1 | mount /dev/sda2 /mnt |
安裝
鏡像站設定(加速用,非必要)
vim /etc/pacman.conf 加入交大鏡像站。
1 | [core] |
開始安裝系統套件。1
pacstrap /mnt base base-devel linux linux-firmware
系統配置
fstab
生成 fstab 檔案,定義儲存設備的初始化和連接系統方式。
-U 用 UUID 分類定義,-L 則用分割標籤,
我們前面切磁碟沒上標籤,所以用 -U 吧。
1 | genfstab -U /mnt >> /mnt/etc/fstab |
change root
切進硬碟當 root 囉!
1 | arch-chroot /mnt |
時區 & 語言 & 網路
1 | # ln -sf /usr/share/zoneinfo/Region/City /etc/localtime |
先裝個 vim 比較順手,vi 不太順。1
pacman -S vim
編輯 /etc/locale.gen 反註解 en_US.UTF-8 UTF-8 及 zh_TW.UTF-8 UTF-8。
然後用 locale-gen 生成檔案。
加入環境變數 echo "LANG=en_US.UTF-8" > /etc/locale.conf。
設定電腦名稱。
我決定叫他卡巴內里了。1
echo "kabaneri" > /etc/hostname
vim /etc/hosts 最後一行加上:1
2
3127.0.0.1 localhost
::1 localhost
127.0.1.1 kabaneri.localdomain kabaneri
建立開機映像檔 & 設定密碼
1 | mkinitcpio -p linux |
啟動載入程式 & 安裝網路工具
1 | pacman -Sy grub os-prober efibootmgr |
WARNING: Failed to connect to lvmetad. Falling back to device scanning.
不用太擔心這個 warnning。
1 | pacman -S net-tools wireless_tools dhclient wpa_supplicant |
重開前先設定好 dhcpcd。1
2
3
4systemctl enable dhcpcd.service
exit
umount -R /mnt
reboot
安裝系統後
手動設定 DNS(防雷)
1 | echo "nameserver 8.8.8.8" >> /etc/resolv.conf |
用戶
new user named zxc
1 | pacman -S sudo |
下載 yay
do follows as normal user
1 | git clone https://aur.archlinux.org/yay.git |
桌面環境
i3 擁護派一定要 i3。
然後既然是桌機,配備又好,那就漂亮點,裝 deepin 吧 :)
值得注意的是,我用上文 lightdm-deepin-greeter 還是 blank screen,
lightdm-gtk-greeter 也怪怪的。
所以改用 lightdm-webkit2-greeter(需要 yay)。然後主題使用 Aether(水尬靠杯)。
我又叛逃了,現在使用的是 Litarvan。(因為發現 Aether 不能記憶我上次使用的桌面系統)
1 | sudo pacman -S xorg xorg-server deepin deepin-extra |
接著設定 dm,deepin 用的是 lightdm,這部份 yay 自動幫你做,你可以確認一下。
1 | vim /etc/lightdm/lightdm.conf |
找不到原本的 #greeter-session=example-gtk-gnome,而是已經被換成:1
greeter-session=lightdm-webkit2-greeter
接下來把 dm 加到啟動設定。1
2systemctl start lightdm.service # 在命令列啟用,先是試開不開得起來,以免悲劇
systemctl enable lightdm.service # 成功之後再下這行,開機後永久啟用
1 | sudo pacman -S i3-gaps i3lock i3status |
中文化 & 輸入法
1 | yay -S ttf-dejavu ttf-droid ttf-freefont ttf-hack ttf-liberation |
ibus daemon reference
daemon program autostart
Google Chrome
1 | yay -S google-chrome |
reference: archlinux wiki 電腦故我在